Reactive-Native 框架的简单尝试
从Reactive-Native的名字说起
字面意思,Reactive响应式,Native原生。就如JSPatch下发热更新修复线上问题,本质上还是利用 OC 的 runtime 特性,把 JS 解析并注入运行时,比如在 class 中加属性就是改变对象模型的 offset,加方法就是在 method list 中增加对应的 selector 并映射到相关的 method,改变方法 method swizzling 等等,总之 runtime 能做的事情,解析这段 JS 文件以后也可以执行,和原生的代码一样的性能,而不是在 webview 中去渲染,体验更佳流畅,这就是 Native。经过 FB 大神们的封装,JS 的写法不再是原生的 JS,而是和React如出一辙(http://reactjs.cn/react/index.html),这就是 Reactive
接下来我们来试一下官方的几个 basic demo
安装(https://facebook.github.io/react-native/docs/getting-started.html)注意执行,react-native run-ios 的时候,如果闪退,检查下网络配置,因为本地会有 node.js 的服务,全局代理冲突了会无法访问。
写一个 hello world,文档(https://facebook.github.io/react-native/docs/tutorial.html) import, from, class, extends, and the () => 这些语法都是ES2015标准,
再往下看文档会发现,每一个 RN 框架中的 class 其实都继承于 Component,而一个组件 Component 是由 props 和 state 控制的,写下这两个概念
Props
大多数组件可以被自定义创建,当然需要不同的初始化参数,这里叫做Props,看到demo(https://facebook.github.io/react-native/docs/props.html#content) <Greeting name=’Rexxar’ />,组件创建需要参数 name, 然后在 Greeting 这个 Class 中访问这个参数需要从 props 进入,this.props.name。只在初始化组建的时候使用,不能改变的。
State
Props 在组件的生命周期中是固定的,如果组件的状态发生改变,比如输入框输入新的内容,那么我们就要使用 state 来追踪这些改变。一般情况下,我们在 constructor 中初始化 state,看到https://facebook.github.io/react-native/docs/state.html#content,this.state = {showText: true};,这里的 state 是个 bool值。可以选择一个状态容器 state container 比如 Redux
界面布局,总体来说,用 JS 来写,CSS 可以嵌套,内容与样式分离和 web app 一个套路,还有 flexbox 流式布局等等。简单过一下,TextInput组件,依赖 state 的改变,每次输入以后自动刷新页面。ScrollView 会一次把数据都显示在页面上,没有复用的效果。ListView 有点像 UITableView 可以复用,但也需要 Datasource 来初始化。网络层使用 Mozilla 的 Fetch 框架,你也可以用 Ajax,支持 WebSocket。有通用的 Navigators,也有 iOS 定制的 Navigators,那个页面的堆栈要自己来维护,推入推出操作要手动写,当然也有现成的库(https://github.com/react-community/react-navigation)。在 iOS10.2 的 iPhone6 上运行官方的 demo,我看到那个导航栏在 iOS 上是看不到的,只是一行 text,这种情况也是我担心的风险,OS 升级带来的 bug,所以 RN 要更新及时才行
接下去,我们写个业务相关的demo,包括 login,拿到 token,传递 token 再次发起请求,解析数据,渲染布局等等。开始
react-native init SampleApp
cd SampleApp
react-native run-ios
subl ./
导航使用第三方的(https://reactnavigation.org/)
npm install --save react-navigation打开index.ios.js
import React from 'react';
import {
AppRegistry,
} from 'react-native';
import { StackNavigator } from 'react-navigation';
var Dashboard = require('./Dashboard');
var HomeScreen = require('./HomeScreen');
var ChatScreen = require('./ChatScreen');
const SimpleApp = StackNavigator({
Home: { screen: HomeScreen },
Dashboard: {screen: Dashboard },
Chat: { screen: ChatScreen },
});
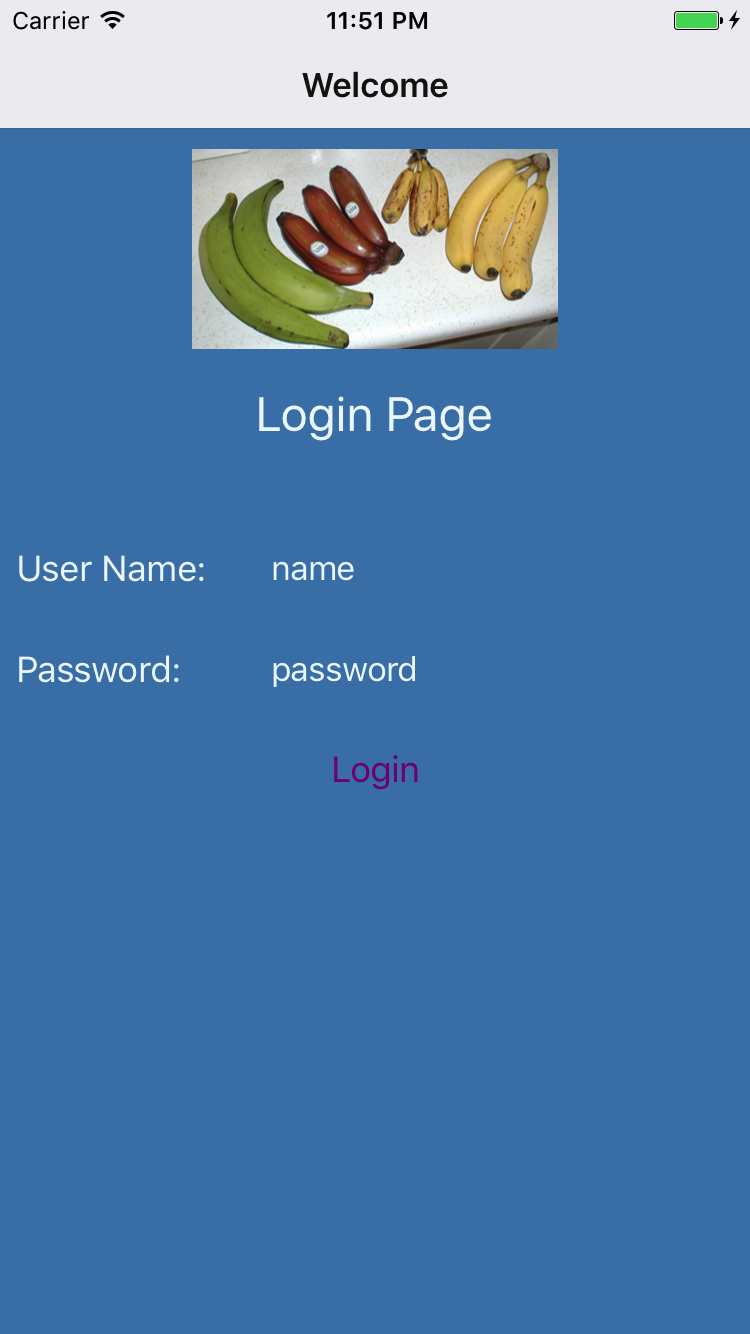
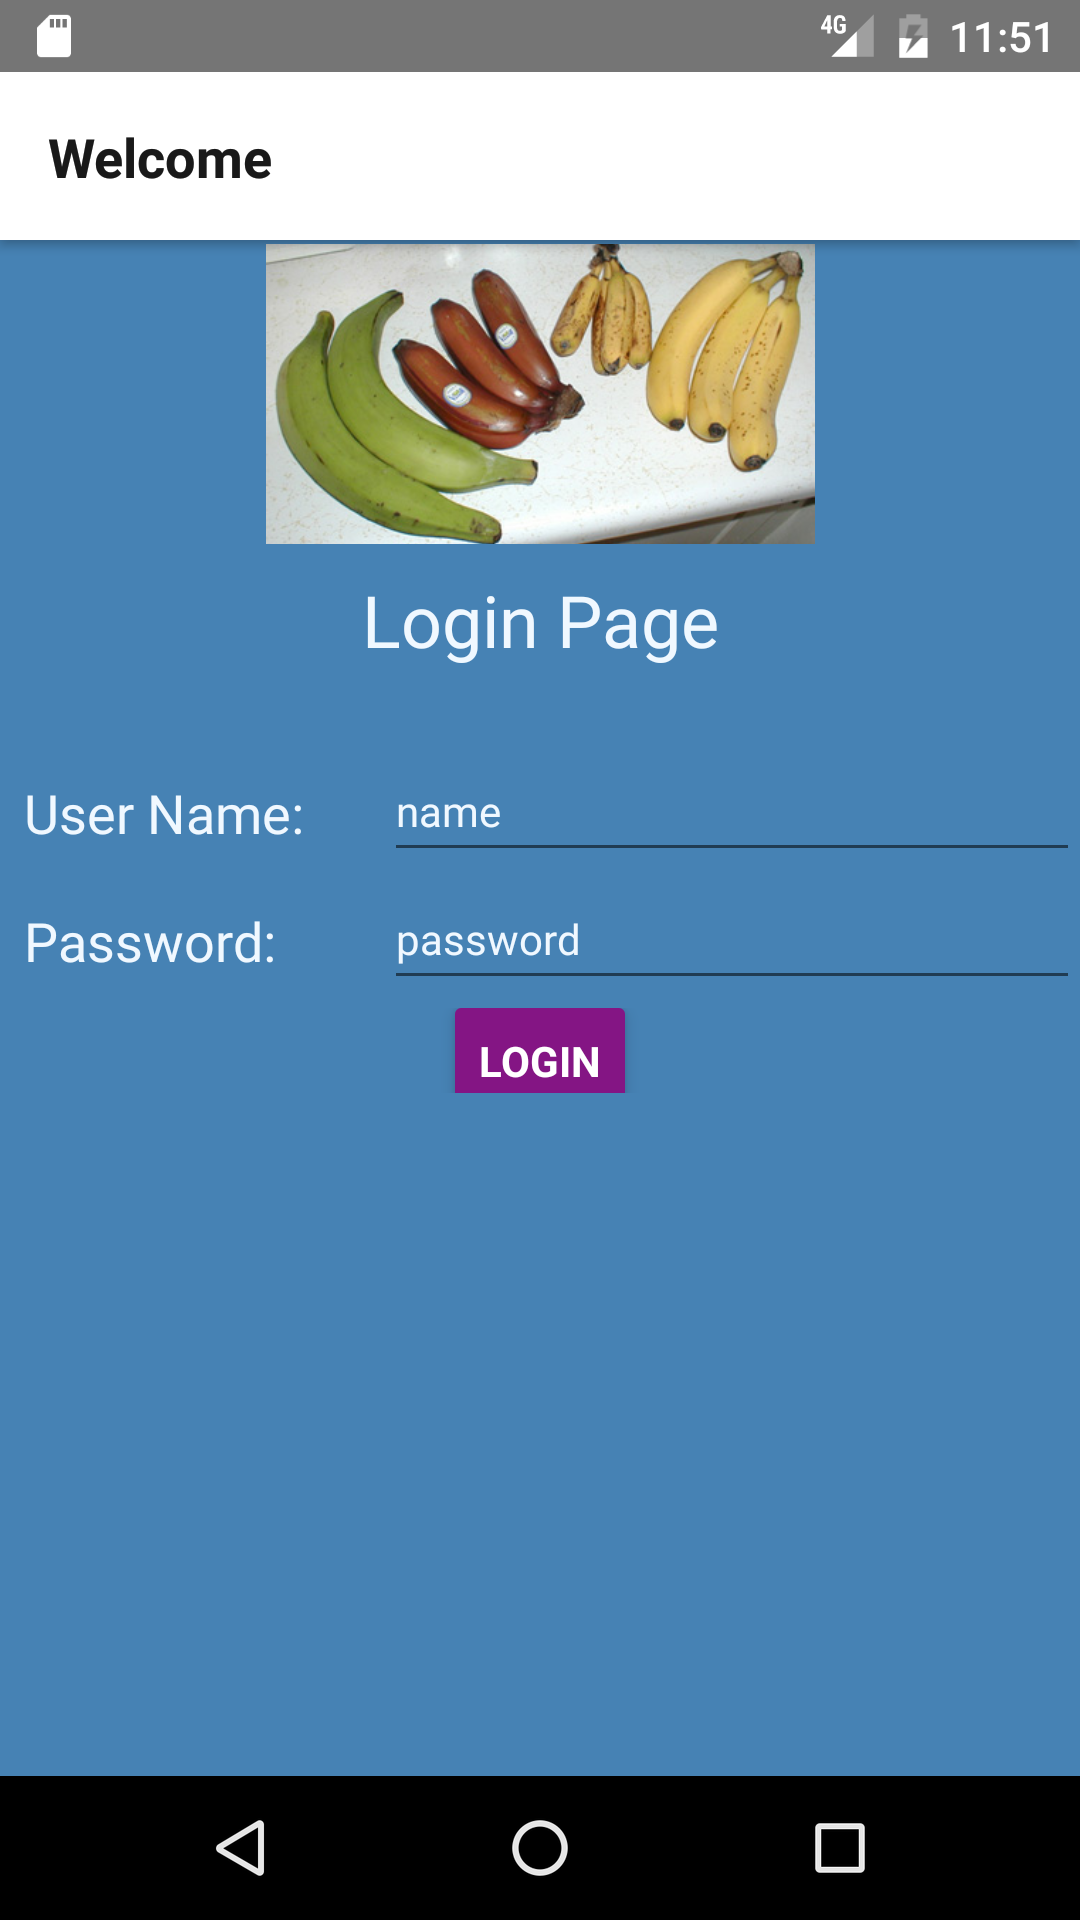
AppRegistry.registerComponent('SimpleApp', () => SimpleApp);StackNavigator 的 building block,可以看作是跳转的路由,现在新建的文件也都是在工程目录下,去掉后缀 .js,最后的 registerComponent 只在第一个入口文件中需要。然后我们来写 HomeScreen.js 吧,先看下完成以后的效果:
import React from 'react';
import {
  Text,
  View,
  Button,
  TextInput,
  Image,
  ActivityIndicator,
} from 'react-native';
import { StackNavigator } from 'react-navigation';
在请求网络的时候我们需要旋转的指示器,代表正在加载,所以需要 ActivityIndicator,状态又分为加载和加载完毕,所以需要在state中保留这个状态
  constructor(props) {
    super(props);
    this.state = {
      isLoading: false
    };
  }
导航栏标题:
  static navigationOptions = {
    title: 'Welcome',
  };
在render中加入indicator
var spinner = this.state.isLoading ? ( <ActivityIndicator size='large'/> ) : ( <View/>);现在我们没有分开样式,直接写在标签语言中像这样:
<View style = { { backgroundColor: 'steelblue', flex: 2, flexDirection: 'column' } }>采用flex相对布局,数字代表权重,如果同一个层级的三个view,flex都是1,那么就是三等分
最后记得把这个类公开,因为其他文件要引用:
module.exports=HomeScreen;完整的 HomeScreen.js 代码见gist
可惜,那个Button,修改同一个color属性,发现两端表现不一样,而是还是by design (https://facebook.github.io/react-native/docs/button.html)
接下去看 Dashboard,我这里请求了该用户的所有 Packages,新的请求需要登录以后的 token,所以,涉及到页面之间的值传递,其实很简单,确定的值,初始化就要使用,Props 对吧,请求的代码:
  fetchBasicDataAsync() {
    const { params } = this.props.navigation.state;
    fetch('https://www.italki.com/api/session/package?page=1&page_size=30&type=all', {
      method: 'GET',
      headers: {
        'Content-Type': 'application/x-www-form-urlencoded',
        'X-Token': params.token,
      },
    })
    .then((response) => response.json())
    .then((responseJson) => {
      console.log(responseJson);
      var dataSource = new ListView.DataSource({rowHasChanged: (r1, r2) => r1.course_title !== r2.course_id});
      this.setState({
        dataSource: dataSource.cloneWithRows(responseJson.data)
      });

    })
    .catch((error) => {
      console.error(error);
    });
  }
注意 Listview,对应于 iOS 中的 UITableView,展现时需要 datasource,JS返回以后是一个 promise 对象,不停地点 then 一步步往下走拿到需要的数据,是一种链式写法,感觉像是语法糖。如果直接在控制台打印 promise 对象会感觉很奇怪,这不是一个正确的姿势。
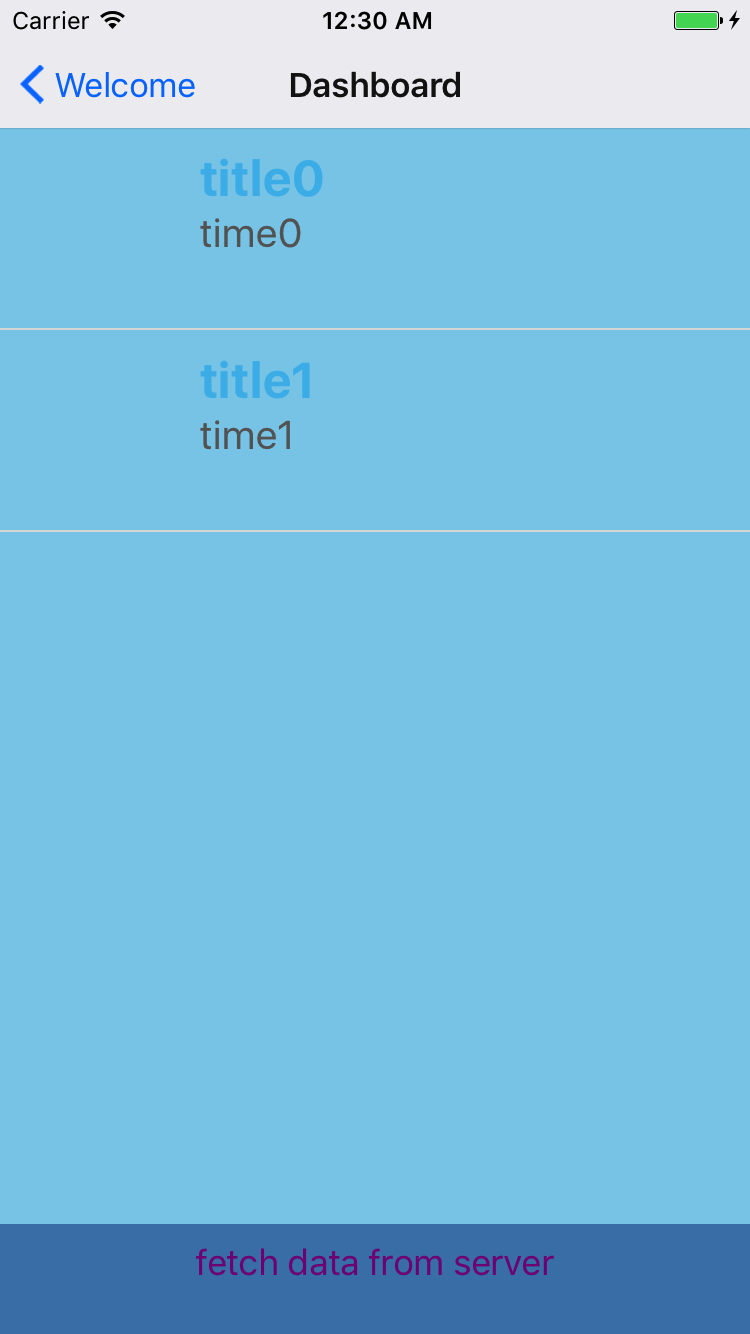
进入页面的时候,我设置了一组假数据,当然也可以是空数据,只不过要再加一个 state 判断页面是否已经有数据。没有数据的时候,页面是这样的:
然后我们生成一份假的数据:
  constructor(props) {
    super(props);
    var dataSource = new ListView.DataSource({rowHasChanged: (r1, r2) => r1.course_title !== r2.course_title});
    this.state = {
      dataSource: dataSource.cloneWithRows([
        {'course_id': '0' ,'course_title': 'title0', 'learn_language': 'Emglish0', 'expiration_time' :'time0','oppo_user_obj': {'avatar_file_name':'imageurl0', 'nickname': 'waterever0'}},
        {'course_id': '1', 'course_title': 'title1', 'learn_language': 'Emglish1', 'expiration_time' :'time1','oppo_user_obj': {'avatar_file_name':'imageurl1', 'nickname': 'waterever1'}}
      ])
    };
  }
注意既然是响应式,什么情况下是等同的,就不需要更新,所以要写 equal 方法,数据的哪个字段代表数据的唯一性要指出来,这个字段必须是存在的,不然报错
在看渲染每一个cell的代码:
  renderRow(rowData, sectionID, rowID) {
    var course_title = rowData.course_title.split(' ')[0];
    return (
      <TouchableHighlight onPress={() => this.rowPressed(rowData.oppo_user_obj.avatar_file_name)}
        underlayColor='#dddddd'>
        <View>
          <View style={styles.rowContainer}>
            <Image style={styles.thumb} source={ { uri: 'https://a499af057572c393815e-e011ef914a29f21f9a22bf73f79926ab.ssl.cf1.rackcdn.com/'+ rowData.oppo_user_obj.avatar_file_name+ '_Avatar_3.jpg' } } />
            <View style={styles.textContainer}>
              <Text style={styles.course_title}>{course_title}</Text>
              <Text style={styles.title}
                    numberOfLines={1}>{rowData.expiration_time}</Text>
            </View>
          </View>
          <View style={styles.separator}/>
        </View>
      </TouchableHighlight>
    );
  }
注意 JSX 的写法,需要 {} 才能引入,样式我们添加样式表,做到内容和样式分离:
var styles = StyleSheet.create({
  thumb: {
    width: 80,
    height: 80,
    marginRight: 10
  },
  textContainer: {
    flex: 1
  },
  separator: {
    height: 1,
    backgroundColor: '#dddddd'
  },
  course_title: {
    fontSize: 25,
    fontWeight: 'bold',
    color: '#48BBEC'
  },
  title: {
    fontSize: 20,
    color: '#656565'
  },
  rowContainer: {
    flexDirection: 'row',
    padding: 10
  }
});
这是对刚才cell的渲染
最后记得,把组件公开:
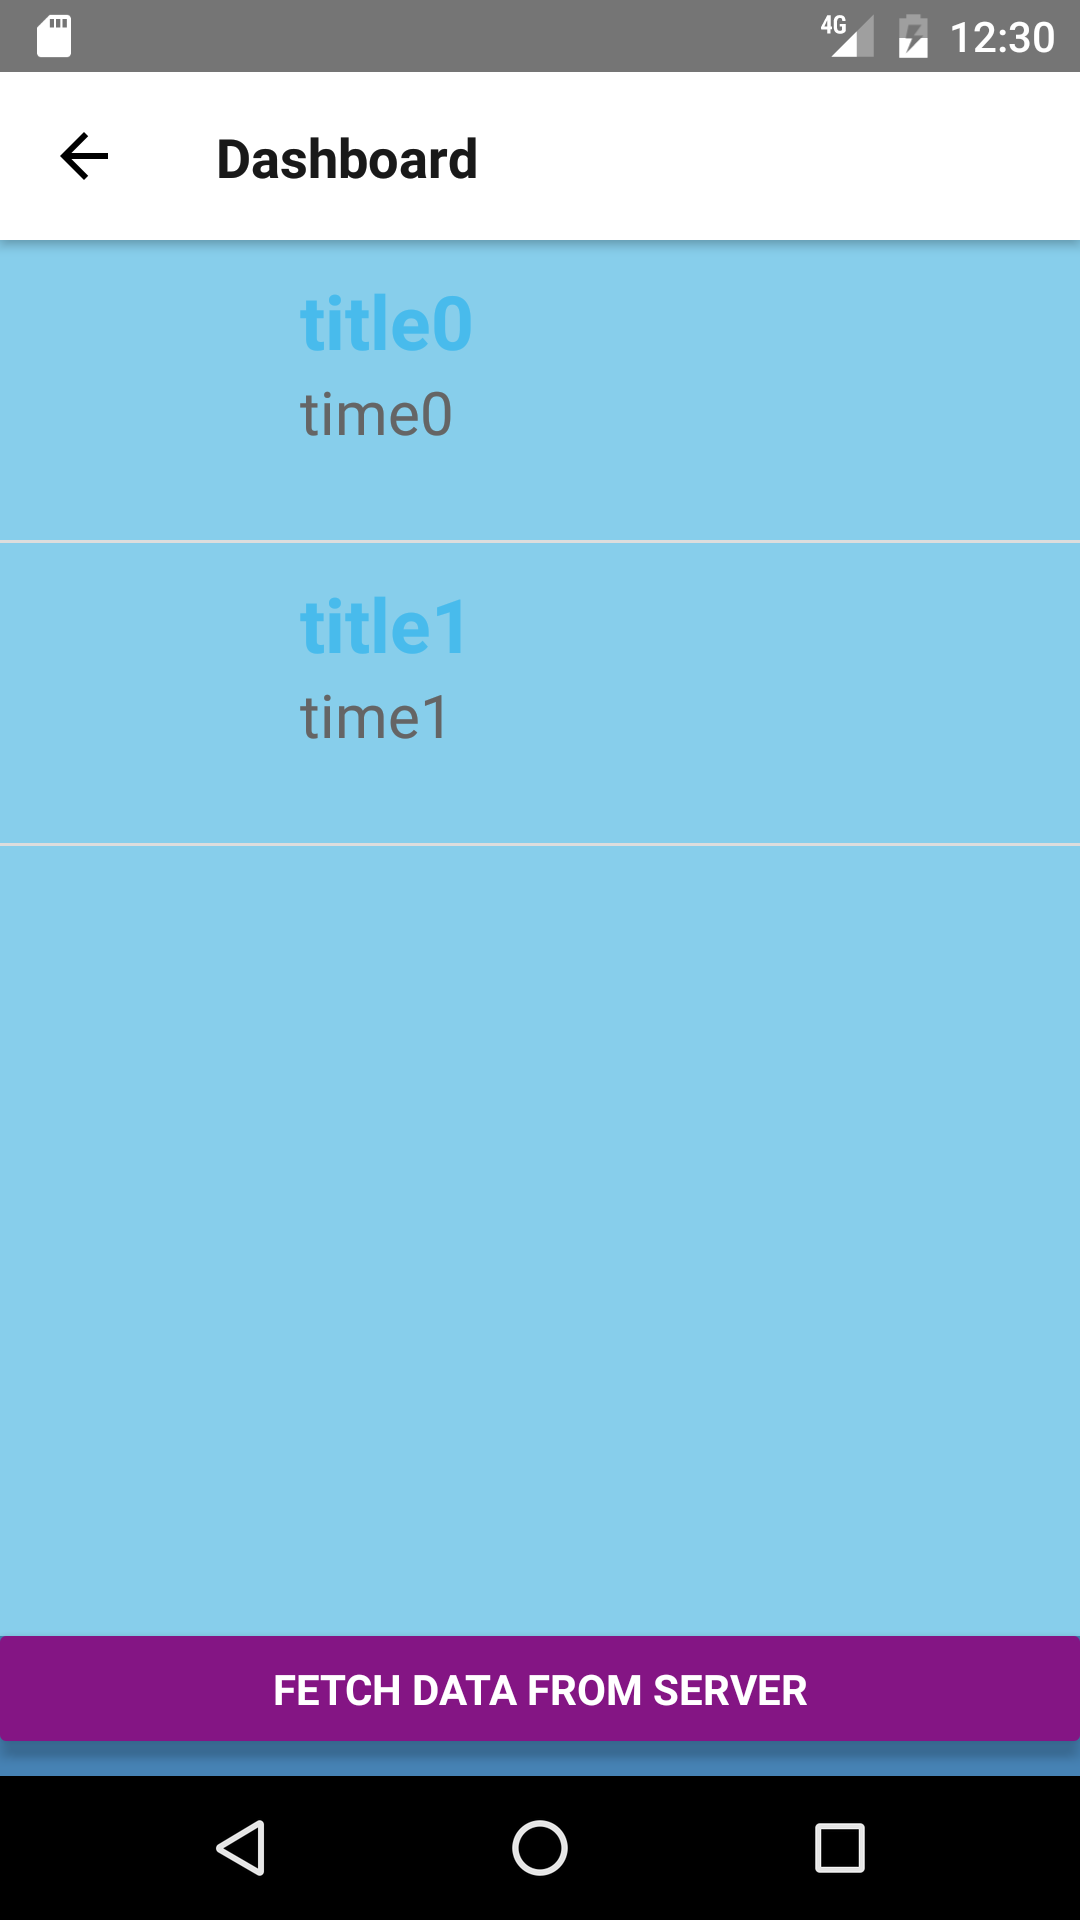
module.exports=Dashboard;点击底部抓取数据的按钮,拿到数据,重新渲染页面,你会看到:
完整的代码见gist
我们的demo实现了,看上去很简单,但自己调试的时候,肯定会遇到问题,看文档就行了,需要很多 web 前端的知识